
Introduction
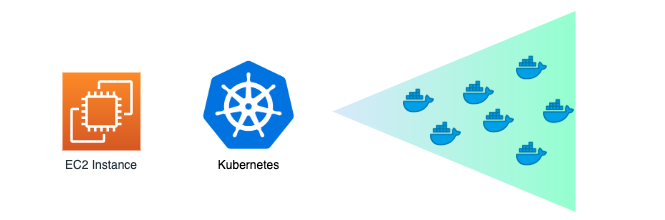
Kubernetes
Kubernetes is an open-source container-orchestration system for automating application deployment, scaling, and management. It was originally designed by Google, and is now maintained by the Cloud Native Computing Foundation.
Single Node Kubernetes Cluster on AWS
In this article, I will share the steps to be done to set up a Single Node Kubernetes Cluster on AWS using kubeadm. This is only for testing and learning purposes.
Steps
1. Create a VPC with minimum 1 Public Subnet
2. Create an Security Groups
Create an Security Group for the Kubernetes Instances ( Eg: SG_K8S_CLUSTER_INSTANCES)
1
2
   Allow all connections from the VPC CIDR
   Allow 6443 from any Public IP from which you would like to manage the cluster
3. Create IAM Policies
kubernetes-master-node-policy
1
2
3
4
5
6
7
8
9
10
11
12
13
14
15
16
17
18
19
20
21
22
23
24
25
26
27
28
29
30
31
32
33
34
35
36
37
38
39
40
41
42
43
44
45
46
47
48
49
50
51
52
53
54
55
56
57
58
59
60
61
62
63
64
65
66
67
{
  "Version": "2012-10-17",
  "Statement": [
    {
      "Effect": "Allow",
      "Action": [
        "autoscaling:DescribeAutoScalingGroups",
        "autoscaling:DescribeLaunchConfigurations",
        "autoscaling:DescribeTags",
        "ec2:DescribeInstances",
        "ec2:DescribeRegions",
        "ec2:DescribeRouteTables",
        "ec2:DescribeSecurityGroups",
        "ec2:DescribeSubnets",
        "ec2:DescribeVolumes",
        "ec2:CreateSecurityGroup",
        "ec2:CreateTags",
        "ec2:CreateVolume",
        "ec2:ModifyInstanceAttribute",
        "ec2:ModifyVolume",
        "ec2:AttachVolume",
        "ec2:AuthorizeSecurityGroupIngress",
        "ec2:CreateRoute",
        "ec2:DeleteRoute",
        "ec2:DeleteSecurityGroup",
        "ec2:DeleteVolume",
        "ec2:DetachVolume",
        "ec2:RevokeSecurityGroupIngress",
        "ec2:DescribeVpcs",
        "elasticloadbalancing:AddTags",
        "elasticloadbalancing:AttachLoadBalancerToSubnets",
        "elasticloadbalancing:ApplySecurityGroupsToLoadBalancer",
        "elasticloadbalancing:CreateLoadBalancer",
        "elasticloadbalancing:CreateLoadBalancerPolicy",
        "elasticloadbalancing:CreateLoadBalancerListeners",
        "elasticloadbalancing:ConfigureHealthCheck",
        "elasticloadbalancing:DeleteLoadBalancer",
        "elasticloadbalancing:DeleteLoadBalancerListeners",
        "elasticloadbalancing:DescribeLoadBalancers",
        "elasticloadbalancing:DescribeLoadBalancerAttributes",
        "elasticloadbalancing:DetachLoadBalancerFromSubnets",
        "elasticloadbalancing:DeregisterInstancesFromLoadBalancer",
        "elasticloadbalancing:ModifyLoadBalancerAttributes",
        "elasticloadbalancing:RegisterInstancesWithLoadBalancer",
        "elasticloadbalancing:SetLoadBalancerPoliciesForBackendServer",
        "elasticloadbalancing:AddTags",
        "elasticloadbalancing:CreateListener",
        "elasticloadbalancing:CreateTargetGroup",
        "elasticloadbalancing:DeleteListener",
        "elasticloadbalancing:DeleteTargetGroup",
        "elasticloadbalancing:DescribeListeners",
        "elasticloadbalancing:DescribeLoadBalancerPolicies",
        "elasticloadbalancing:DescribeTargetGroups",
        "elasticloadbalancing:DescribeTargetHealth",
        "elasticloadbalancing:ModifyListener",
        "elasticloadbalancing:ModifyTargetGroup",
        "elasticloadbalancing:RegisterTargets",
        "elasticloadbalancing:SetLoadBalancerPoliciesOfListener",
        "iam:CreateServiceLinkedRole",
        "kms:DescribeKey"
      ],
      "Resource": [
        "*"
      ]
    }
  ]
}
kubernetes-worker-node-policy
1
2
3
4
5
6
7
8
9
10
11
12
13
14
15
16
17
18
19
20
{
      "Version": "2012-10-17",
      "Statement": [
          {
              "Effect": "Allow",
              "Action": [
                  "ec2:DescribeInstances",
                  "ec2:DescribeRegions",
                  "ecr:GetAuthorizationToken",
                  "ecr:BatchCheckLayerAvailability",
                  "ecr:GetDownloadUrlForLayer",
                  "ecr:GetRepositoryPolicy",
                  "ecr:DescribeRepositories",
                  "ecr:ListImages",
                  "ecr:BatchGetImage"
              ],
              "Resource": "*"
          }
      ]
  }
4. Create IAM role for the EC2 instance
Create IAM role for the EC2 instance (Ref: https://github.com/kubernetes/cloud-provider-aws)
1
2
Create Role       : kubernetes-master-node-role
Attach Policies   : kubernetes-master-node-policy, kubernetes-worker-node-policy
5. Launch an EC2 Instance
Launch an EC2 Instance in VPC Public Subnet (Ubuntu 16.04) + Attach the Security Group you have created in Step 2 and Attach IAM Role created in Step 4
6. Install System updates + Set EC2 Hostname
Install System updates + Set EC2 Hostname (The hostname of each node must match the EC2 Private DNS entry for the instance)
1
sudo hostnamectl set-hostname $(curl -s http://169.254.169.254/latest/meta-data/local-hostname)
7. Setup AWS Tags, Resources used by the cluster must have specific AWS tags assigned to them.
Attach following Tag to
1
2
Key:    kubernetes.io/cluster/kubernetes    (kubernetes.io/cluster/<cluster-name>)
Value:  owned
- EC2 Instances
- VPC
- VPC Subnets
- VPC Route Tables
- VPC Internet gateway
- VPC Security Group
8. Install Docker
1
2
3
4
5
6
7
8
apt-get install     apt-transport-https     ca-certificates     curl     gnupg-agent     software-properties-common
curl -fsSL https://download.docker.com/linux/ubuntu/gpg | sudo apt-key add -
apt-key fingerprint 0EBFCD88
sudo add-apt-repository  "deb [arch=amd64] https://download.docker.com/linux/ubuntu $(lsb_release -cs) stable"
apt-get update
apt-get install docker-ce docker-ce-cli containerd.io
systemctl start docker
systemctl enable docker
9. Install Kubeadm, kubelet, kubectl
1
2
3
4
curl -s https://packages.cloud.google.com/apt/doc/apt-key.gpg | sudo apt-key add -
echo "deb https://apt.kubernetes.io/ kubernetes-xenial main" > /etc/apt/sources.list.d/kubernetes.list
apt update
apt install -y docker-ce kubelet kubeadm kubectl
10. Create kubeadm configuration file ( /etc/kubernetes/aws.yml )
1
2
3
4
5
6
7
8
9
10
11
12
---
apiVersion: kubeadm.k8s.io/v1beta2
kind: ClusterConfiguration
networking:
  serviceSubnet: "10.100.0.0/16"
  podSubnet: "10.244.0.0/16"
apiServer:
  extraArgs:
    cloud-provider: "aws"
controllerManager:
  extraArgs:
    cloud-provider: "aws"
(Makes sure to replace your VPC CIDR)
11. Bootstrap Kubernetes
1
kubeadm init --config=/etc/kubernetes/aws.yml
12. Once the setup is complete, You will get a message as follows + Additional details
Your Kubernetes control-plane has initialized successfully!
13. Configure kubectl (You need to run the following as a regular user)
Configure kubectl
1
2
3
mkdir -p $HOME/.kube
sudo cp -i /etc/kubernetes/admin.conf $HOME/.kube/config
sudo chown $(id -u):$(id -g) $HOME/.kube/config
14. Install Pod Network to the Cluster
Install Pod Network to the Cluster ( Ref: https://docs.projectcalico.org/v3.11/getting-started/kubernetes/)
You should now deploy a pod network to the cluster. Run “kubectl apply -f [podnetwork].yaml” with one of the options listed at: https://kubernetes.io/docs/concepts/cluster-administration/addons/
1
kubectl apply -f https://docs.projectcalico.org/v3.11/manifests/calico.yaml
15. Control Plane node isolation
By default, your cluster will not schedule pods on the control-plane node for security reasons. Run following command to enable it for scheduling
1
kubectl taint nodes --all node-role.kubernetes.io/master-
16 Adding additional Nodes
In case required, you can add additional nodes to this cluster by running following command as root after retreiving token and cert hash from the cluster
kubeadm join x.x.x.x:6443 –token xxxx.xxxx –discovery-token-ca-cert-hash sha256:xxxxxxxxxxxxxxxx